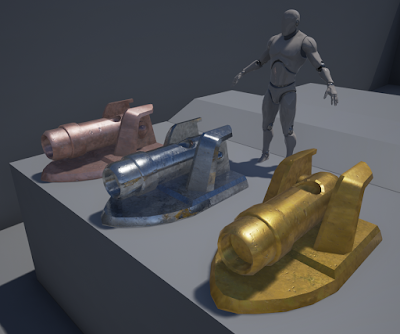
So, this was my first time using a 3D modeling program. EVER. Needless to say, the 2 hours worth of lecture videos translated to 6 hours of figuring-stuff-out for me. It was fun... in a masochistic way. After 7 hours of that workshop on Houdini, I stayed late at my desk, obsessively experimenting with tools and tweaking the cannon's annoying posts (fire the concept artist pls), until 10 p.m. in the building. Luckily, no one murdered me in the parking lot, so I got that going for me.
Aside from attempting to follow the tutorial verbatim, I decided to try and figure out how to add that cannonball-reload hole that was visible in the top-view concept art. I tried doing it manually with the multi-cut tool: THAT was a disaster. So I googled around, and learned about the Boolean stuff. It felt like cheating, but I stuck a cylinder into the top, went to Mesh>Boolean>Difference, and automatically had a hole. Selecting the edges from that hole, I then extruded it to make a bumpy sort of beveled ring (Bevel was failing me). At first I wanted to go and make the cannon hollow, but when I imported that into UE4, I found that looking down into the ammo-hole let you "see through" the cannon barrel through the base. I suppose it makes sense; its a surface with normals pointing outward, so whatever is inside shouldn't be visible. I suppose I would have to make a secondary surface for the inside to make it truly hollow, and I imagine that lesson will come sometime in the future.
Until then, here is my finished cannon, ready to be shipped off to the cannon shop where Mr. Buffbot can find a solution for all his explosive needs.
 |
| "The copper cannon is cheaper, the steel cannon looks more murdery, but the gold cannon attracts the ladies. Decisions, decisions!" |

No comments:
Post a Comment